Tag Archives: dairy-free

Vegan and Gluten-Free Lasagna

Decadent melt-in-your-mouth lasagna, pretending it was eaten with green accompaniments. Lies!

Catchy name, hey? Fret not, this lasagna is so saucy cheesy good that it has little use for clever titles and is also omni-approved. It’s only downside is that it is a wee bit tedious. But then, isn’t that always the case with lasagna?  While delicious, it’s not really a weeknight food.

So, obviously I made this on the weekend and it wasn’t really that much work. I just prefer to make lasagna when company is coming over because it feeds a crowd and also pleases said crowd. I’m sorry, folks, it’s been a long day and I have a cold and am not feeling especially clever and this recipe is going to be a doozy to write!

I hope I’m not turning you off making this now! Don’t listen to me! I’m cranky. What I was trying to say was that it’s not a big deal. People are coming over, so you’re cleaning your house, right? Trying to make it look like your bathroom always sparkles! Well, while you’re doing that, have your sauces simmering. Once they’re done, you really just have to assemble your lasagna and bake it. Do your dishes, and it looks like a lasagna just magically appeared out of your squeaky clean oven. I love that! There’s something so 50s housewifish about pulling a casserole or something out of a pristine kitchen.

Another good thing about lasagna, and this recipe in particular, is that not only allows your guests to feast, but also feeds you for a week, because this recipe makes one big lasagna, and then also a secret second mini one. I had some of my secret one for lunch today, and it really does get better with age. So freaking good. Sadly, it’s gone now, but yours doesn’t have to be! Invite people over so you have an excuse to indulge, or just treat yourself because you deserve it! Yes, you.

The main lasagna, all dressed up and ready to go! Into the oven.

This recipe is made without wheat or dairy, but honestly, you can’t tell. The cheese sauce recipe is pretty much Karina‘s, although I didn’t consult it this time because I have made it so often that I just wing it now.

A note on the vegetable layer: this recipe made enough for the larger lasagna, but not the secret mini one, which is the one I photographed. Honestly, it was really good without the veggies, because it was more comfort food-y. I like to throw the veggies in for a little extra nutritional value, but they are optional.

As for the noodles, I used rice lasagna noodles, which aren’t specifically oven ready, but you can treat them like they are! No boiling necessary, for real! They turn out beautifully every time.

The following sauce recipes are really handy, as they are ones I make all the time as my go-to tomato and cheese sauces, respectively.

Tomato Sauce Ingredients:

2 tbsp. olive oil

1 1/2 white onions, diced

1 tsp. dried basil (or fresh basil, if you have– use more!)

5 cloves garlic, minced

1/2 cup red wine

2 tbsp. capers, chopped (optional)

2 24-0z bottles Italian strained tomato sauce aka passata di pomodoro (mine had basil leaf in it)

2 small or 1 large can Hunt’s plain tomato sauce

salt and pepper to taste

Tomato Sauce Directions:

Heat oil in a soup pot on medium to medium-low heat. Add onion and sprinkle with a little salt. Sauté for 15-20 minutes until soft, stirring as needed and adjusting the heat so the onions don’t burn at all.

Add basil, rubbing it between your hands. I think this releases the flavour, but I might be making that up. I kind of just don’t like the texture of dried herbs, so I like to soften them up.

Add garlic and let cook 1 minute until fragrant.

Turn heat to max, and add wine. Stir until wine has reduced and the alcohol has evaporated. Turn heat back down to medium and add capers and all of the tomato sauces.

Cover, reduce heat a little and simmer for half an hour.

Taste, and add salt and pepper if needed.

Cheese Sauce Ingredients:

4 tbsp olive oil

4 heaping tablespoons rice flour

2 cups plain non-dairy milk

3 cups water

1 tsp. onion powder

1 1/2 tsp. garlic powder

1 1/2 tsp. salt

1/2 cup nutritional yeast

1 tbsp tahini

1/2 tsp. balsamic vinegar

1/2 tsp. cayenne (optional- this’ll give it a kick, which you may not want for mac ‘n’ cheese, but it’s good in lasagna)

1/2 cup Daiya (optional)

salt and pepper to taste

Cheese Sauce Directions:

Heat olive oil in a medium saucepan on medium heat.

Whisk in flour and let cook for around 2 minutes.

Slowly whisk in milk and water, letting the sauce thicken in between additions.

Once sauce is almost as thick as you’d want it to be, whisk in all other ingredients.

Let the sauce cook until desired thickness. Taste for salt, pepper, and garlic powder. I added a little more of all these things!

Vegetable Mixture Ingredients (Optional and Flexible):

1 tbsp olive oil

1/2 white onion

crown of broccoli

3 cloves garlic

1/2 bunch kale

2 handfuls fresh spinach

small box of mushrooms

Vegetable Mixture Directions:

Dice all ingredients into small pieces. The idea here is to sort of mimic your standard spinach layer, not create a vegetable lasagna.

Heat olive oil in a large frying pan or, even better, a wok, on medium-high heat.

Sauté vegetables until soft, around 20 minutes or so.

Lasagna Ingredients:

The above 3 components

2 boxes of rice lasagna noodles (or 1 if you don’t want an extra mini one)

1 small tub of vegan cream cheese (optional)

Directions:

Preheat oven to 375 degrees fahrenheit.

Meanwhile, assemble your lasagnas! My large pan is 9″ x 13″ and my small one is 8″ x 8″, by the way.

Spread a layer of tomato sauce on the bottom of the pan, followed by noodles, then tomato sauce, then cheese sauce, then noodles, then all of the vegetables and continue on like that until you run  out of space, leaving about an inch of room on top. I like to finish with cheese sauce. Don’t be stingy with sauce! The noodles need it to cook properly and they soak up a fair amount. I also like a saucy lasagna. Also, don’t overlap the noodles. You’ll need to break them to fit, possibly, as I did. Save little weird noodle pieces for your secret lasagna! It’s pretty much made of them!

Distribute little dollops of cream cheese evenly on top, cover with foil, and bake for 30 minutes. Uncover, and bake another 15 minutes, or until noodles are easily pierced with a fork.

Let stand 10 minutes before serving.

Note: I don’t bake 2 lasagnas at once, because I tried it once and the noodles turned out really gross. You can assemble the 2 lasagnas at the same time, but bake them one at a time. The little one likes to bake while everyone’s eating because then everyone is distracted and won’t realize that you’re holding out on them!

Whew! I need some lasagna after all that. How about you?

Cheesy, saucy goodness, just like a real lasagna!

2 Comments

Filed under Dinner

Vegan Spinach Artichoke Dip

Vegan spinach artichoke dip and friends (rice crackers and a really yummy beet dip)

In my last post, I claimed that my recipes were going to be healthier, with more of a focus on whole grains, fruits ands vegetables. Still true, I swear! This is a recipe I meant to post a couple weeks ago but never got around to.

I never used to like spinach dip very much because I’ve always had an aversion to mayonnaise. When I was kid, I’d freak out if someone left an open jar on the counter because the smell made me queasy. Yep, it was a pretty intense hatred. As I got older, I slowly started to tolerate mayo in the form of aioli. For some reason, if it was flavoured and not thick and white, I would eat it in small doses.

So, needless to say, I absolutely hated spinach dip with its gobs of the nasty white stuff. Over the Christmas holidays I got a weird craving for spinach dip and decided to make a double batch of it. I took it to a couple holiday gatherings to be sure I’d have something to eat. It ain’t health food, but it certainly is lighter than its mayo-ridden counterpart, thanks to a good dose of white beans!

Without further ado, here’s my vegan take on the ubiquitous potluck hit.

This would be gross if there was mayo in it.


Put into a food processor and process until very smooth:

1 19 oz can white beans, drained and rinsed (I used kidney)

1 tub Tofutti vegan cream cheese

juice of one lemon

2 garlic cloves, sliced

1 tsp salt

1 tsp cayenne

a few dashes of Tobasco (I added maybe 6? I like a kick.)

a generous amount of freshly ground pepper

Add in and pulse until combined:

1 227g can sliced water chestnuts, drained

2 green onions, sliced

1 box frozen spinach, thawed and water squeezed out

1 14 oz can whole artichokes, drained

That’s it, that’s all! Serve with accoutrement of choice.


Leave a comment

Filed under Condiments and Sauces, Salads and Sides

Vegan Gluten-Free Eggnog Cupcakes

Better late than never?


I do apologize for the tardiness of this post, fellow Keeners, as the holiday season is drawing to a close and I’m not sure people still have the need for an eggnog cupcake post. But, gosh, these were tasty little morsels of holiday cheer, so I’m posting the recipe anyway!

Christmas was the usual whirlwind and I’ll spare the gory details but, suffice it to say, I spent Boxing Day curled up on the couch in my pyjamas with my kitty cat, officially christmassed out.

I’d like to think of this post as a last hurrah, as it is New Year’s Day and the usual No more sugar! No more flour! thoughts are swirling in my head. I’m feeling inspired by this post on FatFree Vegan Kitchen. The meal plan Susan proposes kind of resembles how I used to eat and I remember how good it felt to eat a diet of mostly fruits and vegetables, whole grains and beans. So, just putting it out there that there may be a few changes afoot. Nothing crazy, just maybe less baked goods.

With that said, let’s talk about cupcakes! I used Karina’s vanilla cupcake as a base for these because, as I can’t stop saying, she is the vegan and  gluten-free baking goddess. I eggnog-ized them by adding nutmeg, cinnamon and soy nog. I decided a cream cheese icing would be best (when isn’t it the best, really?) and made it eggnoggy with the aforementioned spices.

These cupcakes were enjoyed on Christmas Eve with coffee and brandy and good company.

Happy New Year, everyone!

A spiced eggnog cake adorned with cream cheese icing: a delicious last hurrah

* Recipe taken from Gluten-Free Goddess and tweaked slightly. Makes 12 cupcakes.

Dry Ingredients:

1/2 cup sorghum flour

1/2 cup brown rice flour

1 cup tapioca starch

1 cup organic cane sugar

1/2 tsp sea salt

1 tsp baking powder

1 tsp baking soda

1 tsp xanthan gum

1 tsp cinnamon

¼ tsp nutmeg

Wet Ingredients:

1 cup soy nog

2 eggs worth of vegan egg replacer (or 2 eggs) (Follow package directions for egg replacer to water ratio)

3 tbsp vegetable oil

1 tbsp vanilla extract

1/4 tsp lemon juice

Directions:

Preheat oven to 350 degrees fahrenheit and line a 12-cup muffin tin with cute paper liners.

In a large bowl, whisk together all dry ingredients.

In a large measuring cup, whisk together all wet ingredients, except for the egg replacer. Whisk the egg replacer in a separate bowl or measuring cup, then mix it in with the rest of the wet ingredients.

Add wet to dry and beat with an electric mixer until smooth, being careful not to over mix.

Evenly divide batter into the muffin tin and bake for 15 to 22 minutes, testing after 15 with a toothpick.

Let cool in tin for a few minutes, then transfer cupcakes to a wire rack.

Cool completely before icing.

Icing Ingredients:

4 oz (half a tub)  Tofutti cream cheese (vegan)

1/4 cup vegan margarine

1 tsp vanilla

splash soy nog

2 cups icing sugar (not sure if this is officially vegan, guys)

2 dashes cinnamon

2 dashes nutmeg

Directions:

Cream together margarine and cream cheese with an electric mixer. Add vanilla, soy nog, cinnamon and nutmeg, mixing until combined.

Beat in icing sugar, 1 cup at a time.

Taste for spice and add more cinnamon and nutmeg as desired.

Frost cupcakes and sprinkle with a little more cinnamon.

Yum.


1 Comment

Filed under Desserts

Tomato Garlic Chickpea Soup

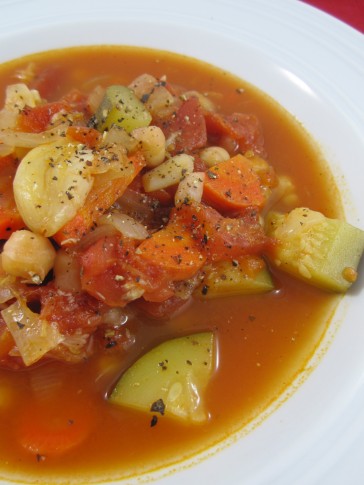
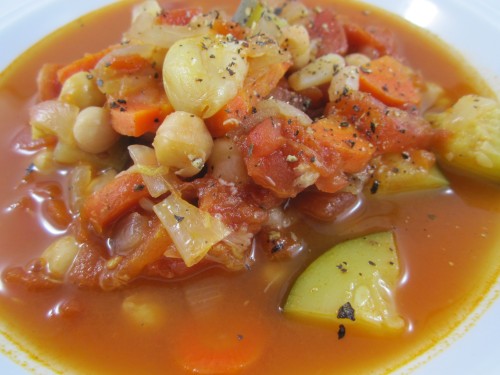
Garlic soup for the vegan soul.

You know that thing where you haven’t done the weekly grocery shop and you find yourself with a sparse crisper and you’re sick of seeking sustenance from a bag of Daiya and a couple corn tortillas?

Yes?

Can we be friends?

Because I seem to find myself in this predicament on a biweekly basis. Well, thank goodness for blogs, I tell you! And for stewy soupy concoctions.

The inspiration for this particular combination was equal parts bare fridge and a FatFree Vegan Kitchen recipe for White Bean and Garlic Stew. Since I modified it a fair amount, I’ll share my version. Also, we thought it was quite delicious, thanks to something I hadn’t tried before– adding an entire bulb of garlic to a normal-sized pot o’ soup.

Do it, people, just do it. As promised by Susan, the whole cloves of peeled garlic become very mellow and yummy, just like when garlic is roasted. The garlic really gave the soup a richness and depth that made it addictive and seconds-worthy.

Vampire proof.

Ingredients:

1 tbsp olive oil

1 large white onion, diced

1 bulb garlic (about 15-20 cloves) peeled

2 large carrots, sliced

1 small zucchini, chopped

2 cups water

2 bay leaves

1 tsp salt

1 tsp vegetable bouillon

freshly ground pepper

1 28-oz can diced tomatoes, juice left in

1 19-oz can chickpeas. drained and rinsed

Directions:

In a soup pot, heat olive oil on medium heat.

Sauté onions for 5 minutes.

Add carrots, zucchini and garlic cloves and sauté another few minutes.

Add water, salt, bouillon, bay leaves, chickpeas, and tomatoes. Cover, lower heat and simmer for an hour, stirring and adding more water and adjusting salt if you want it soupier.

Serve with freshly ground pepper.

Savour the delicious garlic cloves and share some with your nearest and dearest.

Serves 5-6.

And now, just ’cause, a pretty little ditty by some nice young British boys:

4 Comments

Filed under Dinner, Soups

Apple Cinnamon-Kissed Vegan Gluten-Free Waffles

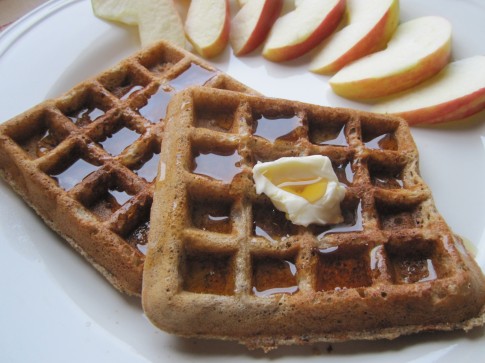
Make yourself feel better about having a desserty breakfast: put something fresh and crunchy on the plate!

I’ve been a bad, bad bloggeuse. Very neglectful and very uninspired. Je suis désolée. I now have a profound respect for those hardworking bloggers that come home from their nine-to-fives and tirelessly churn out innovative and delicious recipes, and then even have time to write about it!

Not I. I am having a hard time even finding the energy to make a meal that is passable. Which is why I have been raiding the not-so-distant archives of The Keen Kitchen to remember my tried and true favourites, like my Creamy Coconut Chickpea Curry. Weeknight yums.

Well, inspiration finally struck this morning when I decided to use my new-to-me waffle maker. My inner waffle monster has wanted one for a really long time. Waffles on a whim? Stupendous!

This is my first foray into the vegan gluten-free waffle world. I have to admit, I was filled with trepidation and have been putting off making waffles for a good month. So, to all you waffle-phobes out there, give it a try! These are no more complicated than your average vegan gluten-free pancakes (which are admittedly kind of complicated by nature), and they have super fun maple syrup-holding crannies.  Plus, they cook themselves in the waffle iron. No flipping required. Take that, pancakes!

Waffles smugly demonstrating their superior maple syrup-holding pockets.

These waffles contain apple and cinnamon, although not overwhelmingly so. They also are a nice balance of hearty and fluffy. These days, when I make pancakes or waffles, I like to feel like I’m getting some fibre, so I always include buckwheat flour. Special thanks to Iris at The Daily Dietribe. I followed her basic waffle guide, and so can you! This is the kind of recipe that you can play around with to suit your tastes.

Ingredients:

Dry

2/3 cup sorghum flour

1/3 cup buckwheat flour

1/3 cup millet flour

3/4 cup tapioca starch

2 tsp. baking powder

1/2 tsp. sea salt

1 tsp. cinnamon

Wet

1/2 cup fresh apple juice

1 cup soy milk (or any non-dairy milk)

1/4 cup unsweetened apple sauce

1 tsp. vanilla

Directions:

Preheat (plug in) waffle iron.

Preheat oven to 200°.

In a medium bowl, whisk all dry ingredients.

In a liquid measuring cup, whisk together all wet ingredients.

Whisk wet into dry until just mixed.

Grease waffle iron before cooking each waffle. I used my silicone brush to spread a small amount of coconut oil onto the griddle.

Pour on enough batter to cover the griddle. My waffle iron could handle around 2/3 cup batter each time.

Cook waffle until done.

Gently open waffle iron and loosen the edges of the waffle. I used a knife.

Keep waffles warm in the oven while you make the rest. If you put them directly onto the oven rack, they will stay nice and crisp. If you put them on a plate, they will get sad and soggy.

Serve with vegan margarine and real maple syrup!

This recipe made 8 small waffles. Two of us finished them all, but this recipe could potentially serve 3 or 4, I suppose. 


4 Comments

Filed under Breakfast

A Very Vegan Fiesta Mexicana: Chipotle Queso Dip

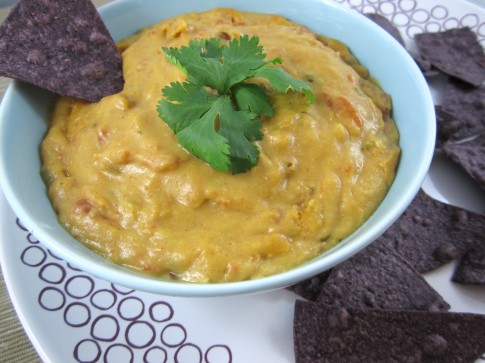
Vegan Chipotle Queso Dip: The perfect guilt-free procrasti-snack!

This post is brought to you by procrasti-snacks and my brand new portable photo studio and lighting kit, a birthday present from my thoughtful father! Right now, I am supposed to be working on an actual paid writing gig, but when my gift showed up I knew I just had to try it out.

The chipotle queso dip I made over the weekend turned out too runny to be really dippable, although the flavour was pretty delightful. So, you see, I simply had to make it again and do a little photo shoot as well. Oh, the things I do for you, my gentle readers. Although the fact that I now have a lovely procrasti-snack to keep me occupied from the impending task at hand is a nice little added bonus.

This recipe is based on one that is floating around the world wide web and is easily found if you search for “vegan queso.” I made a few changes, however: I used my own homemade salsa, made it gluten-free and added a hint of adobo sauce from a can of chipotle peppers. I mostly based it off this one at Nachos NY, which was inspired by Vegan Explosion’s Queso, which seems to not be posted anymore. Fear not! I tinkered with the ingredient quantities I used on the weekend and today’s chipotle queso is a much thicker, dippable dip. If you want to pour this over tortilla chips, à la movie theatre nachos, increase the water or salsa a little and adjust the salt accordingly.

This vegan chipotle queso dip has a hint of spice and boasts a big cheesy flavour. The best thing about it, though, is that it has very little fat compared to a traditional queso dip. It is also full of B vitamins, thanks to good old nutritional yeast.

The only thing that does not make this a completely ideal procrasti-snack is that it only takes about five minutes or so to make, forcing you to get back to work that much faster. Although, you could always blog about it after.

Insert cheesy joke here.

This dip is best served warm. The following recipe makes enough for a few people to have a snack. Double the recipe for a party!

Ingredients:

1/4 cup brown rice flour (regular flour if you are into that kind of thing)

1/3 cup nutritional yeast

1 tsp salt

1/4 tsp paprika

1/4 tsp cumin

1/4 tsp garlic powder

1 cup water

1/3 cup salsa (my recipe here)

1 tbsp vegan margarine (I used Earth Balance)

2 tsp adobo sauce from a can of chipotle peppers in adobo sauce (a nice thing to have in the fridge)

Directions:

Whisk all the dry ingredients in a saucepan.

Whisk in the water.

Turn on the heat to medium or medium low, depending on how hot your stove runs. Mine is super hot, so I lowered the heat.

Keep whisking! Seriously, if you do something else for a minute, you will get lumps.

Once the mixture is thick (this did not take long for me), whisk in Earth Balance until it is melted.

Add salsa and adobo sauce and let the mixture warm up.

Enjoy with some good quality tortilla chips!

Thick and cheesy vegan dip for you!

2 Comments

Filed under Condiments and Sauces

A Very Vegan Fiesta Mexicana: Six Layer Dip

This weekend, I hosted a Mexican themed costume party for my 27th birthday. My original plan was to have a “dress as your favourite celebrity that died at 27” party, thinking there were oodles of them which, happily, there are not. So, Mexican was the next obvious choice. I adore Mexican culture and food. And perhaps I have always wanted to dress as Frida, one of my idols.

Keen Frida.

It was so fun! It was an honour to rub shoulders with skeletons, luchadores and cowboys while dancing to latin tunes and eating veganized Mexican-insired snacks made by yours truly. I also made vegan horchata to wash it all down.

The Spread: Zucchini Guacamole, Six Layer Dip, Vegan Queso, Salsa and Guacamole. Not Shown: Tequila Bar (ugh).

I did not write down the recipe for the zucchini guacamole, as I got the idea from Healthy. Happy. Life.  I didn’t follow Kathy’s recipe, but maybe would not have thought to add lightly sauteed zucchini to traditional guacamole! I think it is a fantastic and delicious way of reducing the fat in typical guac. Not that I really care about that. Anyway, I lightly sauteed the zucchini and tossed it with cubed avocado, minced garlic, lime juice, salt, pepper and cilantro. Or, rather, my sister Zoe did as I barked orders at her during my “party starts in one hour and I have yet to draw on my unibrow” freakout. I also made regular guacamole for my six layer dip. Sorry folks, I did not write that one down either! It also happened during the aforementioned meltdown. It is so simple though: just mash as many ripe avocados as you deem necessary and add minced garlic, lime juice, salt, pepper and cilantro. Easy peasy lime squeezy!

Zucchamole!

Anyway, on to the dip. This recipe makes a large (lasagna-sized) pan of delicious dip, suitable for a potluck! Feel free to halve the recipe.

Six Layers of Heaven.

Ingredients:

1 large 29 oz. can refried beans (make sure there’s no lard!) or 2 smaller cans.

2 12 oz. tubs Tofutti Sour Supreme vegan sour cream

2 tbsp. taco seasoning (store-bought, or make your own, like I did, using this recipe)

A double recipe of salsa (my recipe here)

Guacamole (I believe I used about 8 small avocados, but kept some guac aside for dipping purposes)

3 green onions, sliced in rounds

Canned sliced black olives

Directions:

Place salsa in a sieve over a bowl or jar and let as much liquid drain out as possible. This is important, otherwise you will end up with a soggy, watery dip. No bueno.

In a bowl, mix the vegan sour cream with the taco seasoning.

Using a spatula, neatly spread refried beans in a 9″ by 13″ pan.

Rinse the spatula and spread the drained salsa on top.

Follow with the guacamole and finish with the spiced Sour Supreme.

Sprinkle olives and green onions on top.

Serve with good quality tortilla chips and observe the crowd that develops around your potluck contribution!

Yo tengo hambre.

Coming soon: the recipes for vegan horchata and vegan queso dip!

Hasta luego!

Leave a comment

Filed under Condiments and Sauces, Salads and Sides

Cozy Adzuki Beans with Red Wine, Onions and Thyme

Adzuki Beans stewed with onions, garlic, red wine and thyme taste better than they look.

Today’s recipe is brought to you by the Keen Kitchen Pantry! Want to make something cheap and nutritious that practically cooks itself? Whip up a batch of dried adzuki beans! You don’t need to soak them. Just put them in a pot and let them do their thing while you get on with your life.

I make a big pot of adzukis from time to time and freeze portions in tupperware. Pulling out a container of “homemade” beans feels very… dare I say luxurious? Adzuki beans are pretty mild and go with lots of things. Also, they are apparently easier to digest than other beans and are little nutritional powerhouses. Plus, they are soooooo cute.

I hesitated to post this recipe as this dish is, let’s face it, kind of ugly. But it is really tasty and, once the beans are cooked, comes together in about 20 minutes. If your freezer is a treasure trove of frozen beans, you can have this on the table in the time it takes to watch The Big Bang Theory (oh, how I miss you)!

I serve this as the sort of “meat” part of a meal, alongside a green vegetable and rice. I think it would be good with polenta too.

Add some mushrooms to increase the meatiness and earthy flavour of this cozy feel-good bean dish.

Steamy beanies.

This time around, I decided to cook 3 cups of dried adzuki beans. Rinse the beans and place in a large pot with 3 cups of water for every cup of dried beans. Cover and bring to a boil, then reduce heat to minimum and cook until softened. I salted mine and added a sprinkle of dulse flakes for good measure. They took around an hour, but I wasn’t really pay attention. May have been an hour and a half.

Ingredients:

3 cups cooked adzuki beans, drained

2 tbsp olive oil (or less if you’re anti-fat)

1 medium white onion, halved lengthwise and thinly sliced

3 cloves garlic, minced

1/2 tsp thyme

1/2 tsp poultry seasoning (does not contain poultry. It is a mix of seasonings.)

1/4 cup red wine

1/4 cup broth or water

salt and pepper to taste

Directions:

Heat olive oil on med-low. Cook onions until softened, around 10 minutes.

Add thyme and poultry seasoning and stir until fragrant.

Add garlic and cook for 1 minute.

Add adzuki beans, red wine and broth. Lower heat and simmer, covered, for 10 minutes. Salt and pepper to taste.

You say Fall? I say Beans!

Serves 4 as a side dish. 

2 Comments

Filed under Dinner, Salads and Sides

Vegan Cheesy Potato Bake

Vegan cheesy potato bake: Cheesy and... bean-y.

I’m still here. Sort of. I am not taking the change in weather gracefully.  Going from 30° and sunny to 14° and raining in a matter of a day does not a happy Maya make.

It’s not all doom and gloom here in the Keen Kitchen, I just haven’t really felt inspired to create. Or grocery shop. So I have been whipping up things like vegan mac n’ cheese and weird chickpea and brown rice combos. My culinary highlight of the past two weeks has definitely been Melissa from Swapmeat’s Cuban beans and rice. Make those and imagine yourself enjoying them on the beach with a frosty cuba libre in hand if you want a little sunshine in your life!

I probably should have made those again, but instead spent my day watching all six super-grisly episodes of The Walking Dead back to back, occasionally looking up to gaze sulkily at the raindrops hitting the indoor furniture still on our deck that we stubbornly have not brought in.

Even though I really should have had zero appetite after six hours of  intestine-relishing zombies, my grumbling stomach convinced me to poke around and see what was up in the kitchen. Potatoes were pretty much the only fresh thing. I rarely buy potatoes, as they are a no-no in our house, but today called for comfort food after a gruelling day on the couch. Hence the cheesy potato bake.

Unlike its chockfull-of-dairy counterpart, this vegan cheesy potato bake is low(er) in fat and high in fibre thanks to today’s secret ingredient: white beans. I was feeling guilty about making a dish that has nothing green in it, so I thickened my sauce with beans instead of oil and flour. Nutritional yeast, a vegan cheese sauce staple, adds vitamins and overall yumminess too.

Jack couldn’t stop raving about this. He’s a comfort food kind of guy. He proclaimed it “delicious,” “soooooo good” and the “best scalloped potatoes” he has ever had. Woah! Not bad for a vegan bean-filled potato dish!

I recommend putting some Daiya on this. The liquid dried up a lot during the cooking process and a little Daiya melted on top gave the dish some extra moisture. Hot sauce or ketchup works too!

Zombies HATE vegan cheese.

Ingredients:

2 19-oz cans white beans, drained and rinsed

2 cups water

1 tbsp tamari

2 tsp balsamic vinegar

2 tbsp tahini

3 cloves garlic, minced

2/3 cup nutritional yeast

1 1/2 tsp sea salt

1/2 tsp paprika

freshly ground pepper to taste

4 large potatoes, thinly sliced in rounds

Daiya vegan cheese

Directions:

Preheat oven to 450°.

Place all ingredients besides the potatoes in a blender and blend until smooth.

Grease a large baking dish (mine’s 13″ x 9″). Spread two potatoes-worth of rounds evenly in the dish. Ladle sauce until covered. Layer the remaining two potatoes. Pour remaining sauce on top.

Sprinkle with more paprika and freshly ground pepper.

Cover in tinfoil and bake 30 minutes.

Uncover and bake another 20 to 30 minutes, or until nicely browned on top.

Sprinkle some Daiya on top and put back in oven until melted.

Serve with something green and try not to think about zombies. Enjoy!

Serves 4. 

4 Comments

Filed under Dinner, Salads and Sides

Vegan Spaghetti Puttanesca

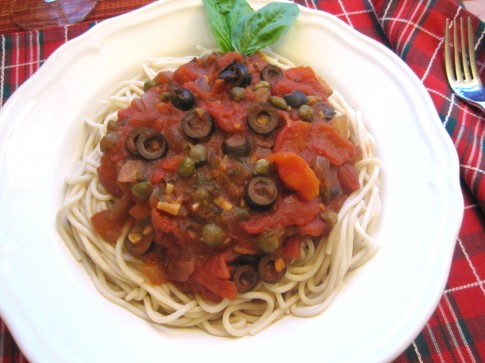
Feed your inner saucy minx with this scandalously delicious puttanesca, sans anchovies.

According to the dictionary on my MacBook (a highly reliable source that has gotten me through many a paper), puttanesca sauce was developed by Italian prostitutes who needed a quick and tasty meal in between clients. Thank you, working gals of Italy! I have no idea if this is actually true, but believing it may add a little mystique to your dinner, so why not?

Savvy Italian prostitutes may not have whipped up this speedy and flavourful sauce, but you certainly should! It is one of the fastest and easiest tomato sauce recipes I know and it packs a punch, thanks to briny olives and capers along with the usual suspects of garlic, basil, tomatoes, onions and wine. I used to make it with anchovies and a wee bit of gorgonzola, but I honestly think it is every bit as good without.

This recipe is another one I honed during my stint living with my Italian second family. It is one of those recipes that isn’t measured and everyone’s version tastes just a bit different. I love how every cook’s food somehow has a distinct flavour, even if the ingredients are the same.

Today, I measured the ingredients as I went but usually I just eyeball it. So please use this as a blueprint and let your inner Italian prostitute guide you.

Vegan puttanesca sauce over brown rice spaghetti. Food styling and photography by Jack.

This sauce doesn’t take much longer to cook than the time it takes to boil your pasta, making it a great weeknight dinner.

Ingredients:

2 tbsp olive oil (or less if you’re watching your fat intake)

1 white onion, diced

1/2 a jalapeño, seeded if it is a hot one

1/4 cup red wine

3/4 cup canned sliced black olives, drained

1/4 cup capers, drained

2 tbsp fresh basil, chopped (optional)

4 cloves garlic, minced

680 mL can Hunt’s plain tomato sauce

28 oz. can diced tomatoes, drained

Brown rice spaghetti (I use Tinkyada brand)

Directions:

Heat olive oil on medium-low. Add onion and jalapeño. Fry, stirring, for 15 minutes until softened. Lower the heat if the onions are browning. This should be a gentle process.

When onions are softened, turn heat to high. Add the red wine and stir constantly until the liquid has reduced and the alcohol has evaporated. Turn the heat back to medium-low.

Add the capers, olives and fresh basil. Fry for 5 minutes.

Put your pasta water on and boil the noodles while you do the following steps.

Add the garlic and stir until fragrant, about 1 minute.

Add Hunt’s and diced tomatoes. Cover and simmer while your noodles are boiling.

Taste for salt. I did not need to add any, thanks to the saltiness of the capers and olives.

Serve over brown rice pasta and sprinkle with a little nutritional yeast (a delightful and vitamin-packed alternative to parmesan).

Buon Appetito!

Serves 6. Or 2 with leftovers. 

2 Comments

Filed under Condiments and Sauces, Dinner, Pasta